
Okay, let’s talk stuffing! For so many of us, especially around the holidays, stuffing is like, THE main event. But who has time to make *amazing* stuffing from scratch when you’re juggling a million other things? I used to think the same, always stressing about getting it just right. That’s why I’m so excited about these Stuffing Recipes Meal Prep That Actually Tastes Great. Trust me, they prove you can have that comforting, herb-infused goodness without all the last-minute fuss. I’ll never forget my first holiday season after I really leaned into meal prepping. I wanted to wow my family with a stuffing that was packed with rich, savory flavors but also super easy to pull off. I took my grandma’s classic recipe, added little tweaks, and spent a Saturday perfecting it. The look on everyone’s faces when they first tasted it? Pure magic! It felt like I’d bridged tradition with modern convenience. Since then, my stuffing has become a holiday centerpiece, and it’s all thanks to proving that meal prep can be downright delicious. I’m David Kim, and as a Tech-Enabled Keto Innovator, I love finding smart ways to make amazing food accessible, especially when it comes to comfort classics like this!
Why This Stuffing Recipe is a Meal Prep Game-Changer
You might be thinking, “Meal prep stuffing? Does it really work?” Oh, absolutely! This recipe is a total lifesaver for anyone who loves a good stuffing but doesn’t have hours to spend on Thanksgiving day. Here’s why you’re going to become obsessed:
- Seriously Convenient: You can make the whole thing ahead of time and just reheat it. No last-minute scrambling!
- Flavor Powerhouse: We’re not skimping on taste here. All those fresh herbs and veggies make it incredibly delicious, no matter when you eat it.
- Super Easy: The steps are straightforward, and even if you’re new to cooking, you’ll nail this.
- Holiday Ready (and Everyday Worthy!): It’s perfect for your Thanksgiving table, but honestly? It’s so good, you’ll want to make it for Sunday dinner too.
It’s all about making fantastic food accessible, even on your busiest weeks.
Gather Your Ingredients for Delicious Stuffing Recipes Meal Prep
Okay, to get started on this amazing meal-prep stuffing that proves Stuffing Recipes Meal Prep That Actually Tastes Great is totally doable, you’ll want to round up your goodies. Think of it like getting all your ducks in a row, but for deliciousness! It’s pretty straightforward, and having everything ready makes the process so much smoother.
For the Stuffing Base
- Bread Cubes: 18 to 24 ounces, preferably toasted or stale. You can totally toast them yourself in the oven until they’re a bit golden and firm, or just use bread that’s a day old.
- Unsalted Butter: 1 cup. This gives us that essential richness.
- Diced Sweet Onion: 3 cups, which is usually about 2 large ones. Sweet onions add a lovely, mild sweetness.
- Diced Celery: 2 cups. It brings that classic, slightly peppery crunch.
- Garlic: 6 cloves, all minced up. Because, garlic!
- Kosher Salt: 1 teaspoon, or just go with a generous pinch.
- Black Pepper: 1 teaspoon, give or take.
- Chopped Fresh Sage: 3 tablespoons. Sage is the heart and soul of stuffing for me!
- Chopped Fresh Parsley: 3 tablespoons. For a bit of freshness and color.
- Chopped Fresh Rosemary: 3 tablespoons. Rosemary adds a lovely, woodsy aroma.
- Chicken or Vegetable Stock: 2 1/2 cups. Pick your favorite, they both work great!
- Large Eggs: 2. These help bind everything together beautifully.
For Garnish
- Fresh Herbs: A fresh mixture for sprinkling on top. A little extra parsley, sage, or rosemary looks and tastes fantastic.
Essential Equipment for Perfect Stuffing
Alright, to make sure your stuffing comes out just right, you’ll want a few trusty kitchen friends. Nothing too fancy, just the basics! Having the right tools makes the whole process super smooth, and trust me, it makes a difference. You’ll need:
- A 9×13 Baking Dish: This is your main stage! It gives the stuffing plenty of room to bake evenly and get that lovely golden-brown top.
- A Large Skillet or Dutch Oven: Perfect for sautéing those delicious onions, celery, and garlic. A good-sized one means you won’t have to cram everything in.
- A Large Mixing Bowl: This is where the magic happens, mixing all those yummy ingredients together before they hit the oven.
Step-by-Step Guide to Making Your Stuffing Recipes Meal Prep
Alright, let’s get down to business! Making Stuffing Recipes Meal Prep That Actually Tastes Great is totally achievable, and this step-by-step guide will make it a breeze. You’ll see just how easy it is to get that amazing flavor and texture, even when you’re planning ahead! For more ideas, check out more stuffing recipes.
Preparing the Bread Cubes
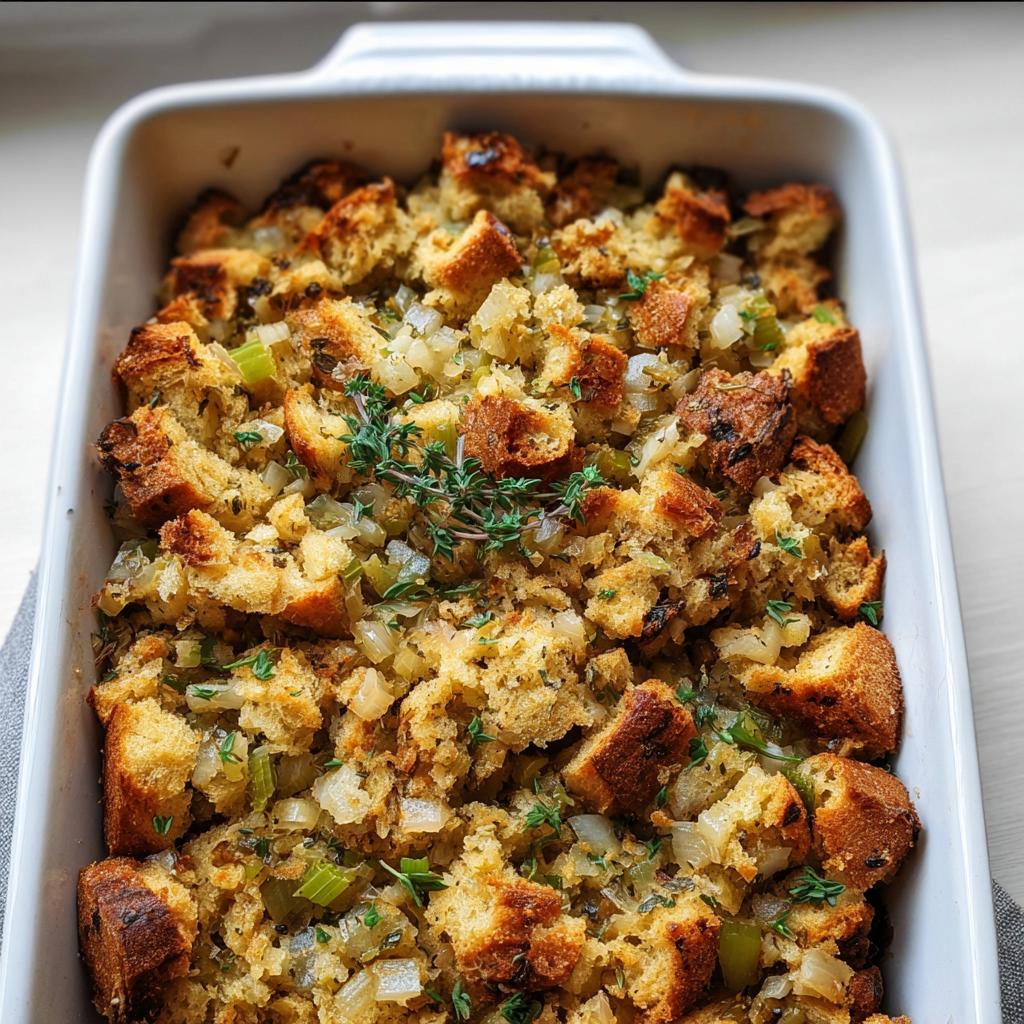
First things first, let’s get those bread cubes ready. You can toss them in the oven at 350°F for about 15 minutes until they’re a bit like croutons, or just use bread that’s been sitting out for a day. I like to cut mine into nice, rustic bite-sized pieces – not too small, not too big, just right!
Sautéing the Aromatics
Now, grab your big skillet or Dutch oven. Melt that butter over medium heat. Toss in your diced sweet onion, celery, and all that minced garlic. Season it generously with salt and pepper – don’t be shy! Let it all soften up until it smells amazing, about 8 to 10 minutes. Then, stir in your fresh sage, parsley, and rosemary. Cook for just another minute until you can really smell those herbs waking up, then add about a cup of your stock and give it a good stir to get all those yummy bits off the bottom.
Combining Wet and Dry Ingredients
In a separate little bowl, whisk those two eggs with the remaining 1 1/2 cups of stock until they’re nicely blended. Now, pour that veggie and stock mixture over your bread cubes in the big mixing bowl. Sprinkle the egg and stock mixture over everything. Gently stir and fold it all together. You want to make sure every single bread cube gets coated without getting too mushy. It should feel nice and moist.
Baking and Resting Your Stuffing
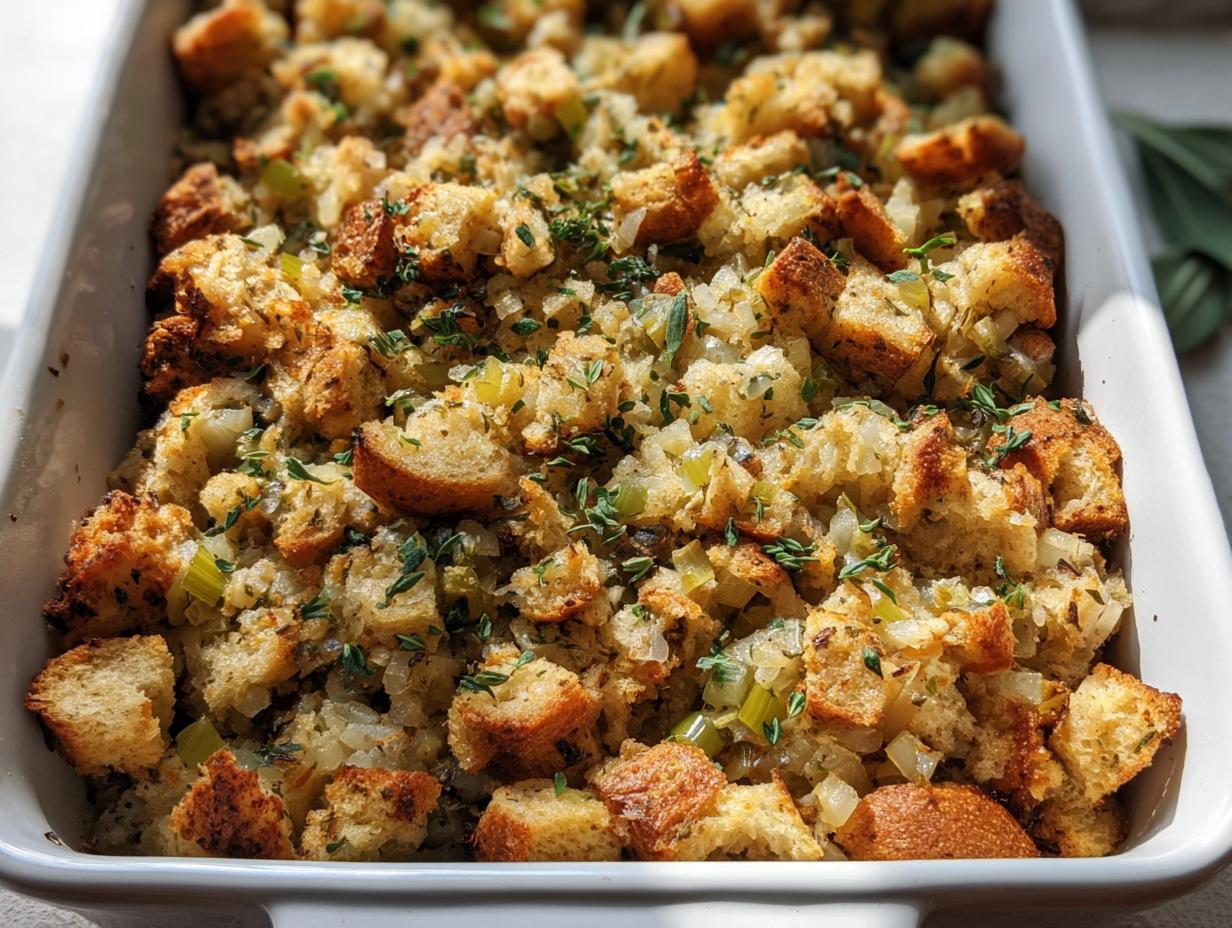
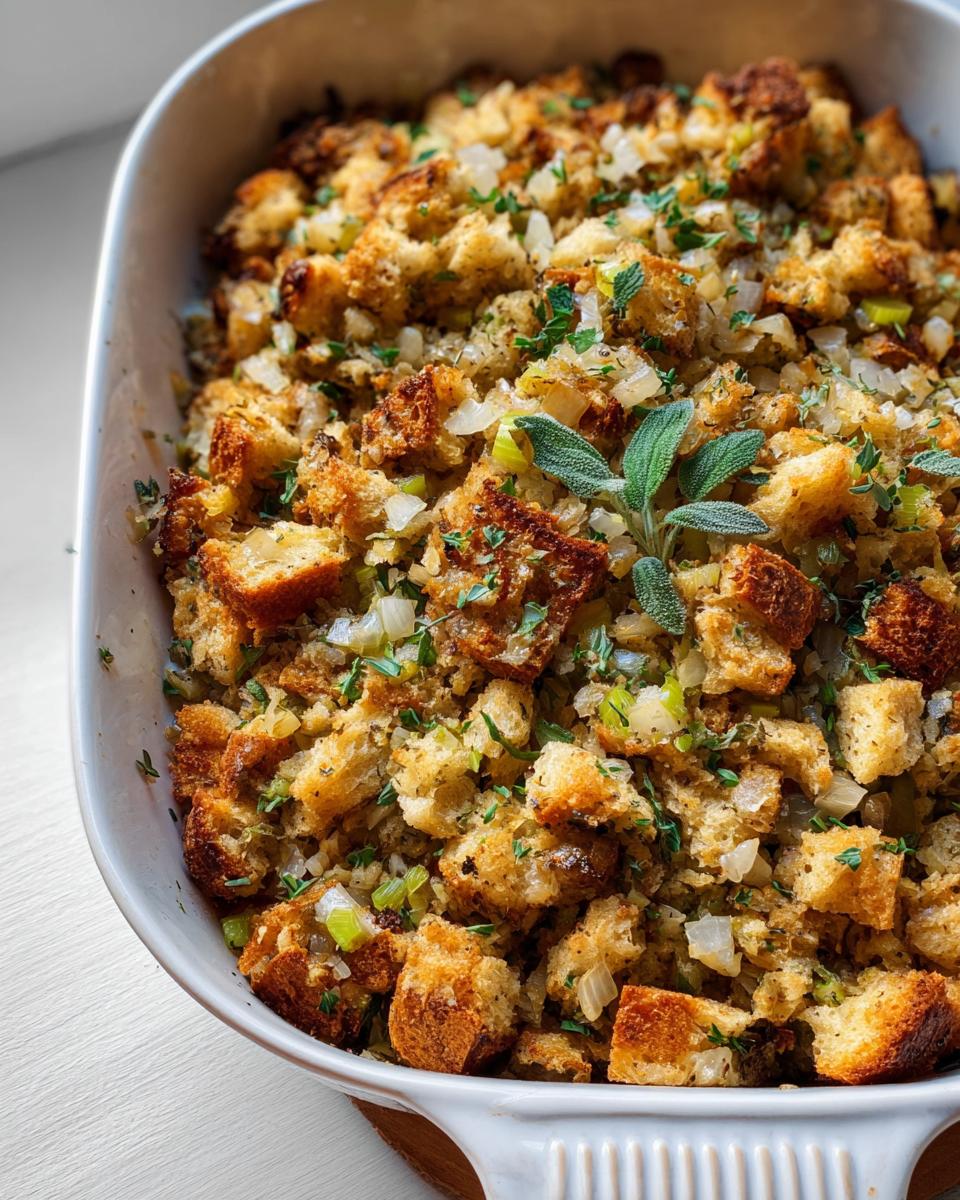
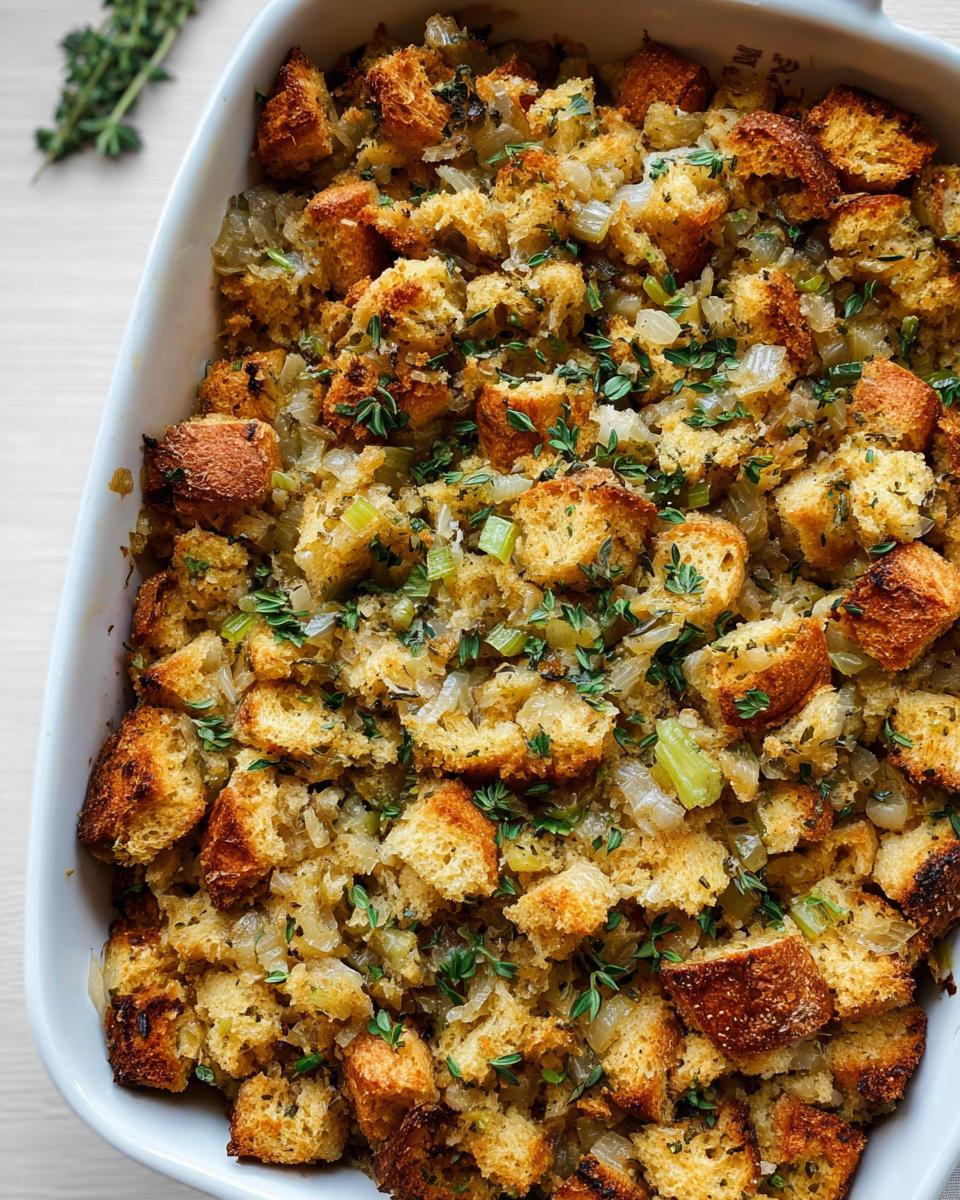
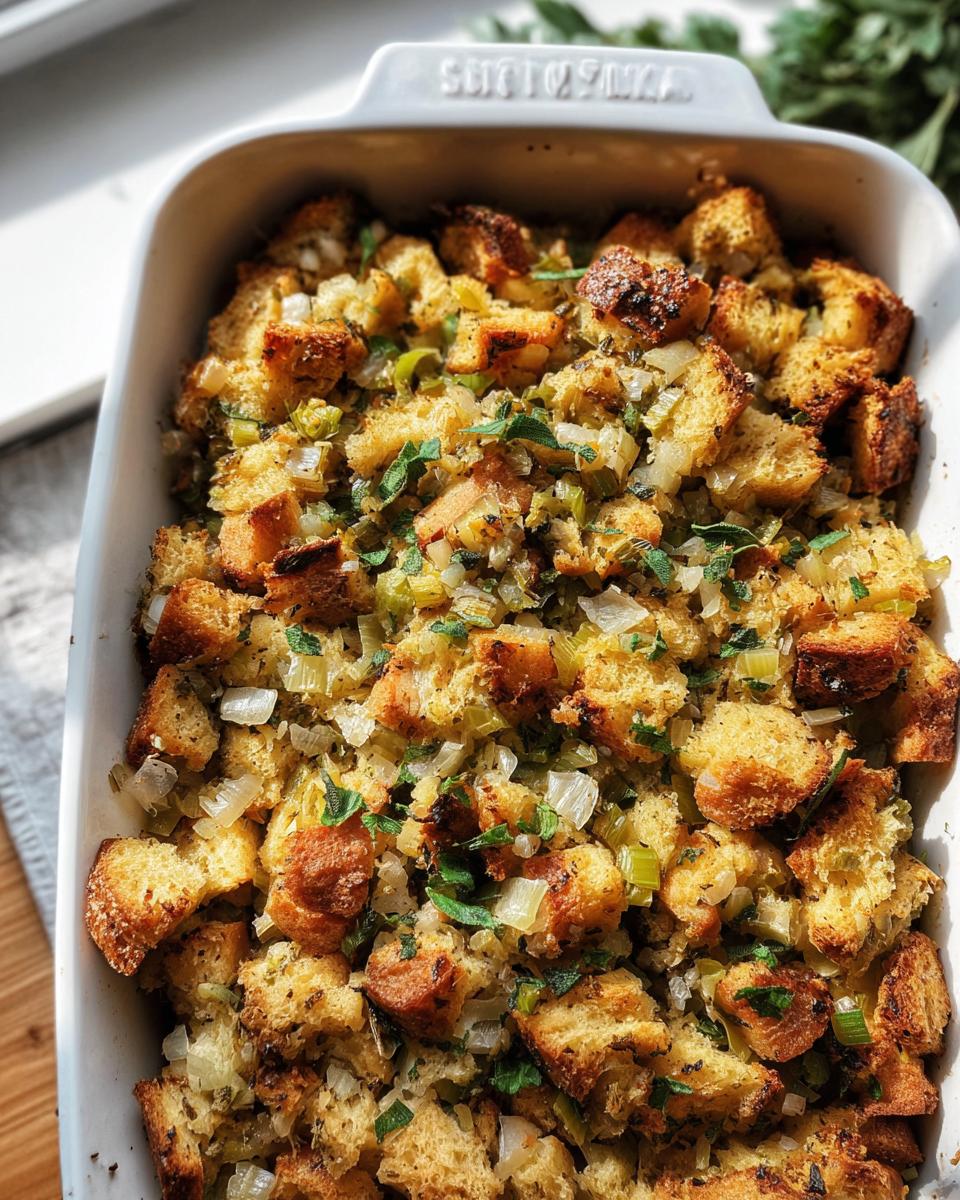
Time to bake! Pour everything into your prepared 9×13 baking dish. Pop it into your preheated 350°F oven and let it bake for about 45 to 50 minutes. You’re looking for that internal temperature to hit 160°F. If the top starts getting too brown before it’s done, just loosely tent it with some foil. The most important part for meal prep? Let it rest for a full 60 minutes after baking. This lets it set up perfectly, which is key for reheating later. Or, if you’re stuffing a bird with it, follow your bird’s stuffing instructions!
Tips for Success with Your Stuffing Recipes Meal Prep
Okay, so you’ve got the basic steps down for these Stuffing Recipes Meal Prep That Actually Tastes Great, but let’s chat about a few little tricks that will totally elevate your game. Trust me, these are the secrets that’ll make your stuffing restaurant-worthy, but still totally fuss-free for meal prep. For more ideas, you can always check out the best stuffing recipes out there to get inspired!
First off, texture is EVERYTHING. If you want that perfect balance of tender inside and slightly crisped edges, don’t skip toasting your bread cubes! This is non-negotiable. It helps the bread soak up the liquid without turning into a gummy mess. And speaking of sogginess, if you’re making it ahead, resist the urge to pour all the stock in at once. Add most of it, then gauge how moist your bread mixture feels before adding the rest. You want it damp, not swimming!
Flavor-wise, don’t be shy with those fresh herbs! They really shine when they’re sautéed with the veggies. Also, consider adding a pinch of nutmeg or a dash of celery seed to the sautéed onions and celery – it adds a little something extra that people can’t quite pinpoint but love. These little touches make all the difference and really make your meal prep stuffing shine!

Ingredient Notes and Substitutions for Stuffing
Okay, so we’ve got this fantastic base recipe, but let’s talk about making it your own! Sometimes you might not have *exactly* what’s listed, or you just want to experiment. It’s all good!
For the bread, while I love a good sturdy sourdough or a hearty country loaf, honestly, almost any bread works. Day-old baguette, challah, even whole wheat can be fantastic. The key is making sure it’s a bit dry so it absorbs all that delicious flavor without turning into mush. If you accidentally use fresh bread, just give it an extra 5-10 minutes in the oven when you’re toasting it.
When it comes to stock, chicken stock is classic, but a good vegetable stock is perfect if you’re keeping it vegetarian. For herbs, if you can’t find fresh rosemary or sage, you can use dried, but use about a third of the amount listed, and add them with the sautéed veggies so they can rehydrate and release their flavor.
Make-Ahead and Storage for Stuffing Recipes Meal Prep
One of the best things about these Stuffing Recipes Meal Prep That Actually Tastes Great is how perfectly they hold up when made ahead. Seriously, this is where the meal prep magic really happens! You can bake the stuffing completely, let it cool down on the counter for about 30 minutes, then cover it tightly with plastic wrap or foil. It’ll keep beautifully in the fridge for up to 3 days. For more meal prep ideas, check out my lazy keto skillet meals!
When you’re ready to reheat, just pop the covered dish back into a preheated oven at around 350°F (175°C). It usually takes about 20-30 minutes to warm through. If it seems a little dry, you can always add a splash more stock or broth before reheating. You want it hot and cozy, not dried out. It really maintains that amazing texture and flavor, making your holiday or busy weeknight meal prep a total win!
Frequently Asked Questions About Stuffing
Got questions about making stuffing, especially when you’re prepping ahead? I’ve got you covered! Here are some common ones. If you need to reach out about anything else, feel free to contact me!
Can I make stuffing without bread?
Absolutely! If you’re looking for a gluten-free option or just want to switch things up, you can totally make stuffing with ingredients like cooked quinoa, riced cauliflower, or even cornbread. Just make sure whatever base you use can hold up to the moisture and flavors without getting mushy!
How do I prevent soggy stuffing?
This is a biggie! The key is toasting your bread cubes really well so they have a nice firm texture. Also, don’t overmix the stuffing once you add the liquid – gently fold everything together. And when you’re reheating, make sure it’s heated through but not overcooked, as that can sometimes lead to sogginess. A little bit of broth added before reheating can help perk it up!
What are good stuffing variations?
Oh, the possibilities are endless! You can add cooked sausage or bacon for extra savory depth, mix in some dried cranberries or toasted pecans for a sweet and crunchy contrast, or even throw in some sautéed mushrooms for an earthy twist. Don’t be afraid to experiment with different herbs too – thyme is another fantastic one!
How long does stuffing last in the fridge?
When stored properly in an airtight container, your delicious, prepped stuffing should stay good in the refrigerator for about 3 to 4 days. It’s perfect for enjoying leftovers a few days after your big meal!
Estimated Nutritional Information
Now, while this stuffing is pure comfort food, it’s helpful to have a general idea of what you’re getting. Keep in mind these numbers are estimates and can really vary depending on the exact brands of ingredients you use and how big your servings turn out. But generally, for a serving of this delicious stuffing, you’re looking at around 350-400 calories, with about 18-22g of fat, 8-10g of protein, and 35-40g of carbohydrates. It’s a hearty side!
Share Your Delicious Stuffing Creations!
I really hope you give this stuffing recipe a try! It’s been such a game-changer for me, and I’d love to hear what you think. Did you make it for a holiday? Or maybe just a Tuesday dinner? Tell me all about it in the comments below! If you loved it, please consider leaving a rating. And hey, if you snap any pics of your amazing stuffing, tag me on social media! I always love seeing your creations. You can learn more about my journey over on the About page!
Stuffing Recipes Meal Prep That Actually Tastes Great
Ingredients
Equipment
Method
- Prepare your bread cubes. You can toast them in the oven at 350 degrees F for about 15 minutes until they resemble croutons, or use stale bread. You can also buy pre-toasted bread cubes. Cut the cubes to your desired size, small or rustic.
- Preheat your oven to 350 degrees F. Prepare a 9×13 baking dish by brushing it with butter or spraying it with nonstick spray. Place the bread cubes in a large mixing bowl or the baking dish.
- Melt the butter in a large skillet or Dutch oven over medium heat. Add the diced onion, celery, and minced garlic. Season with salt and pepper. Cook until the vegetables soften, about 8 to 10 minutes. Stir in the chopped sage, parsley, and rosemary, and cook for another minute. Add 1 cup of stock and stir.
- Pour the vegetable and stock mixture over the bread cubes and toss to coat evenly.
- In a separate small bowl, whisk together the remaining 1 1/2 cups of stock and the 2 eggs.
- Pour the egg and stock mixture over the bread cubes. Stir and fold gently until all the bread cubes are thoroughly combined.
- Bake for 45 to 50 minutes, or until the internal temperature reaches 160 degrees F. If the stuffing begins to brown too quickly, you can cover it loosely with foil.
- Let the stuffing rest for 60 minutes before reheating if made ahead. You can also use this mixture to stuff a bird.
Notes
Tried this recipe?
Let us know how it was!
Tech-Enabled Keto Innovator
My kitchen runs on code as much as coconut oil. After burning out as a Silicon Valley engineer, I discovered keto through a quantified-self experiment that got wildly out of hand. I was tracking every biomarker while optimizing my brain for coding marathons.
What started as personal optimization became an elaborate system of IoT sensors, smart scales, and algorithms. My apartment turned into a lab with app-controlled sous vide machines and remotely monitored fermentation chambers. Yes, I’m that guy.
My biggest achievement? A machine learning algorithm that suggests recipe modifications based on glucose monitor data. Over 3,000 people beta-tested it with measurably improved results. Instead of static recipes, I create dynamic frameworks that adapt to your exercise data, altitude, and local grocery availability.
Food preparation is just another user interface problem—and like good UX, it should adapt to you.